Webhook Configration 🛠️
Prerequisite for webhook configration
Upon successfully logging into the edeXa Ecosystem, you can access the API options using thsese steps but to use these available apis you have to subscribe first and to subscribe refer to this link How to subscribe edeXa api
Now as you already done with subscription part of bStamp apis, now follow this steps along with images to configure webhook into your system.
Steps to configure webhook
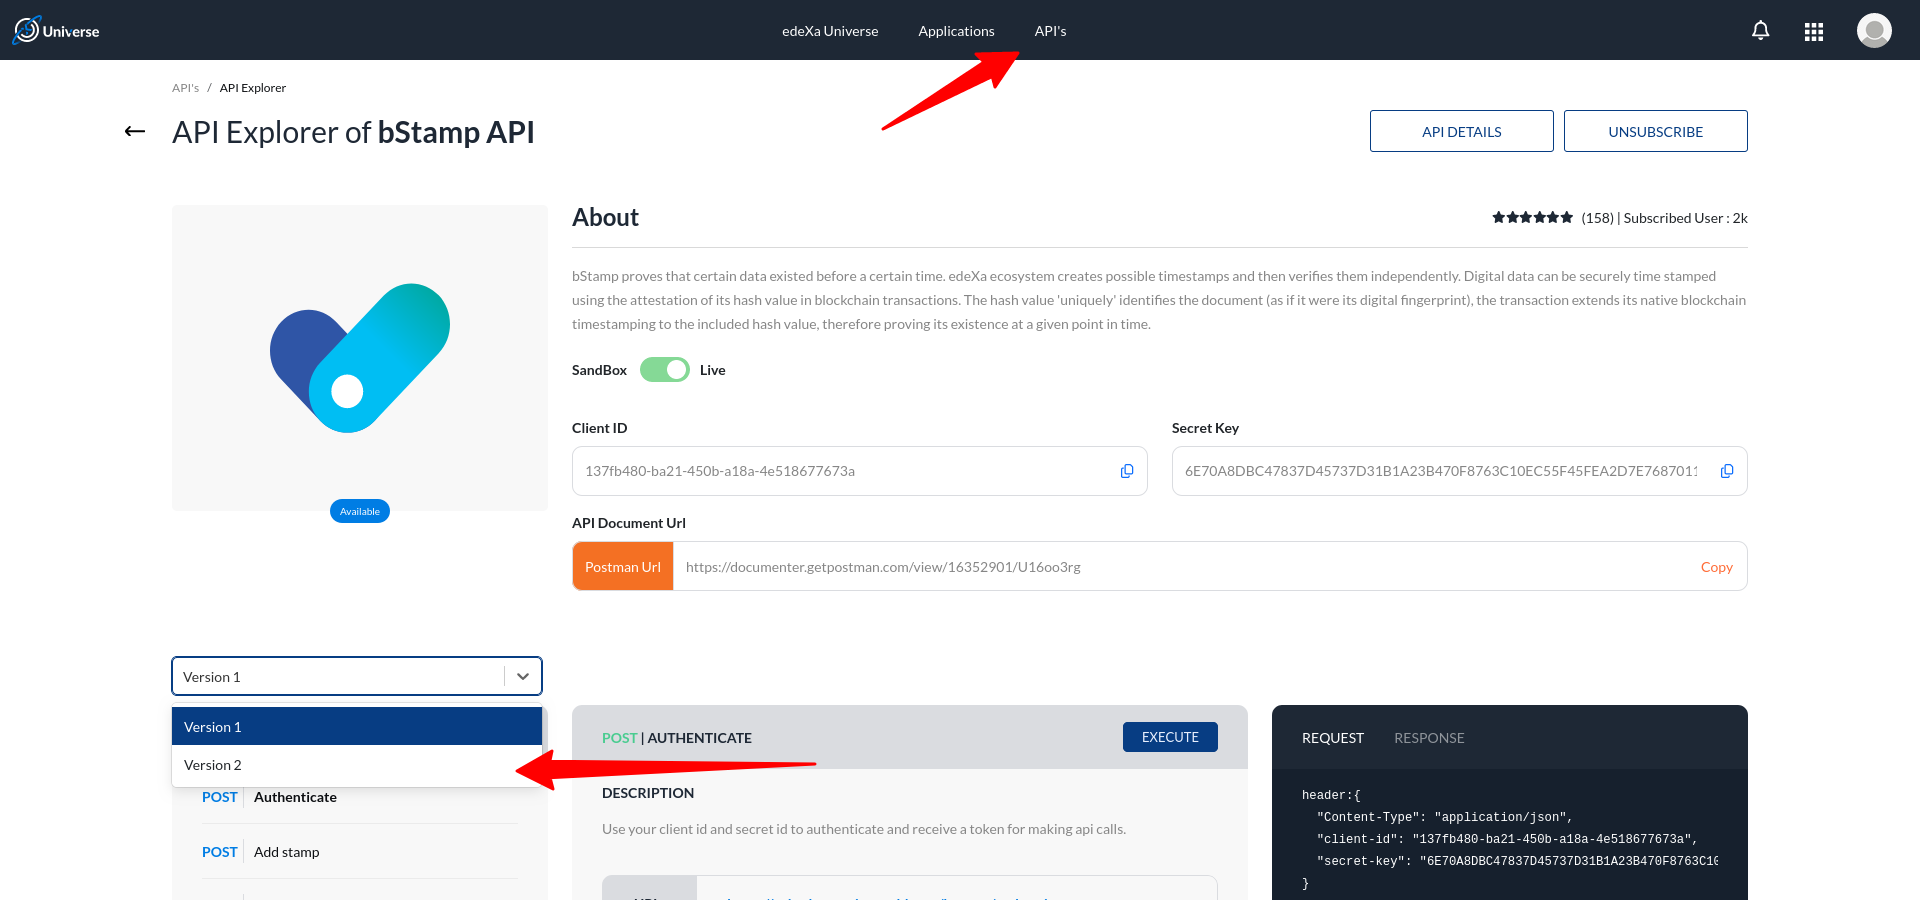
Here, select Version-2 from drop-down menu for webhook functionality with bStamp.
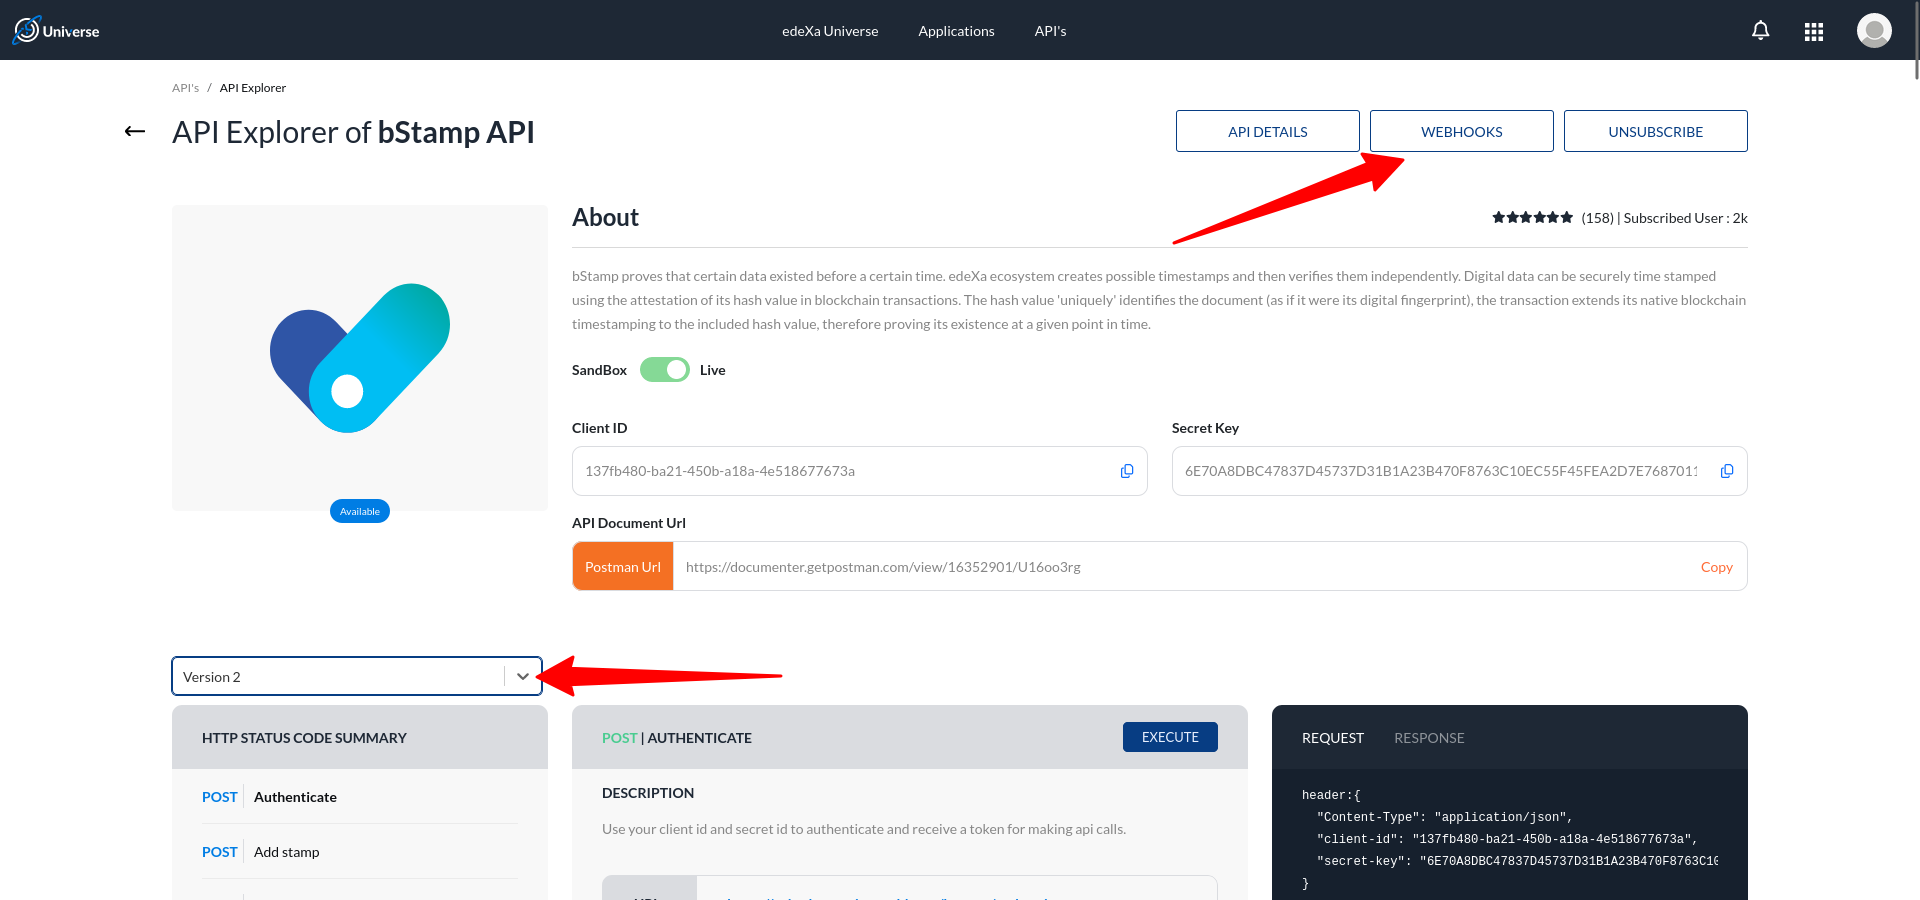
Once you select that Version-2 from dropdown there will be an button named as webhook will be available, pointed out with arrow head.
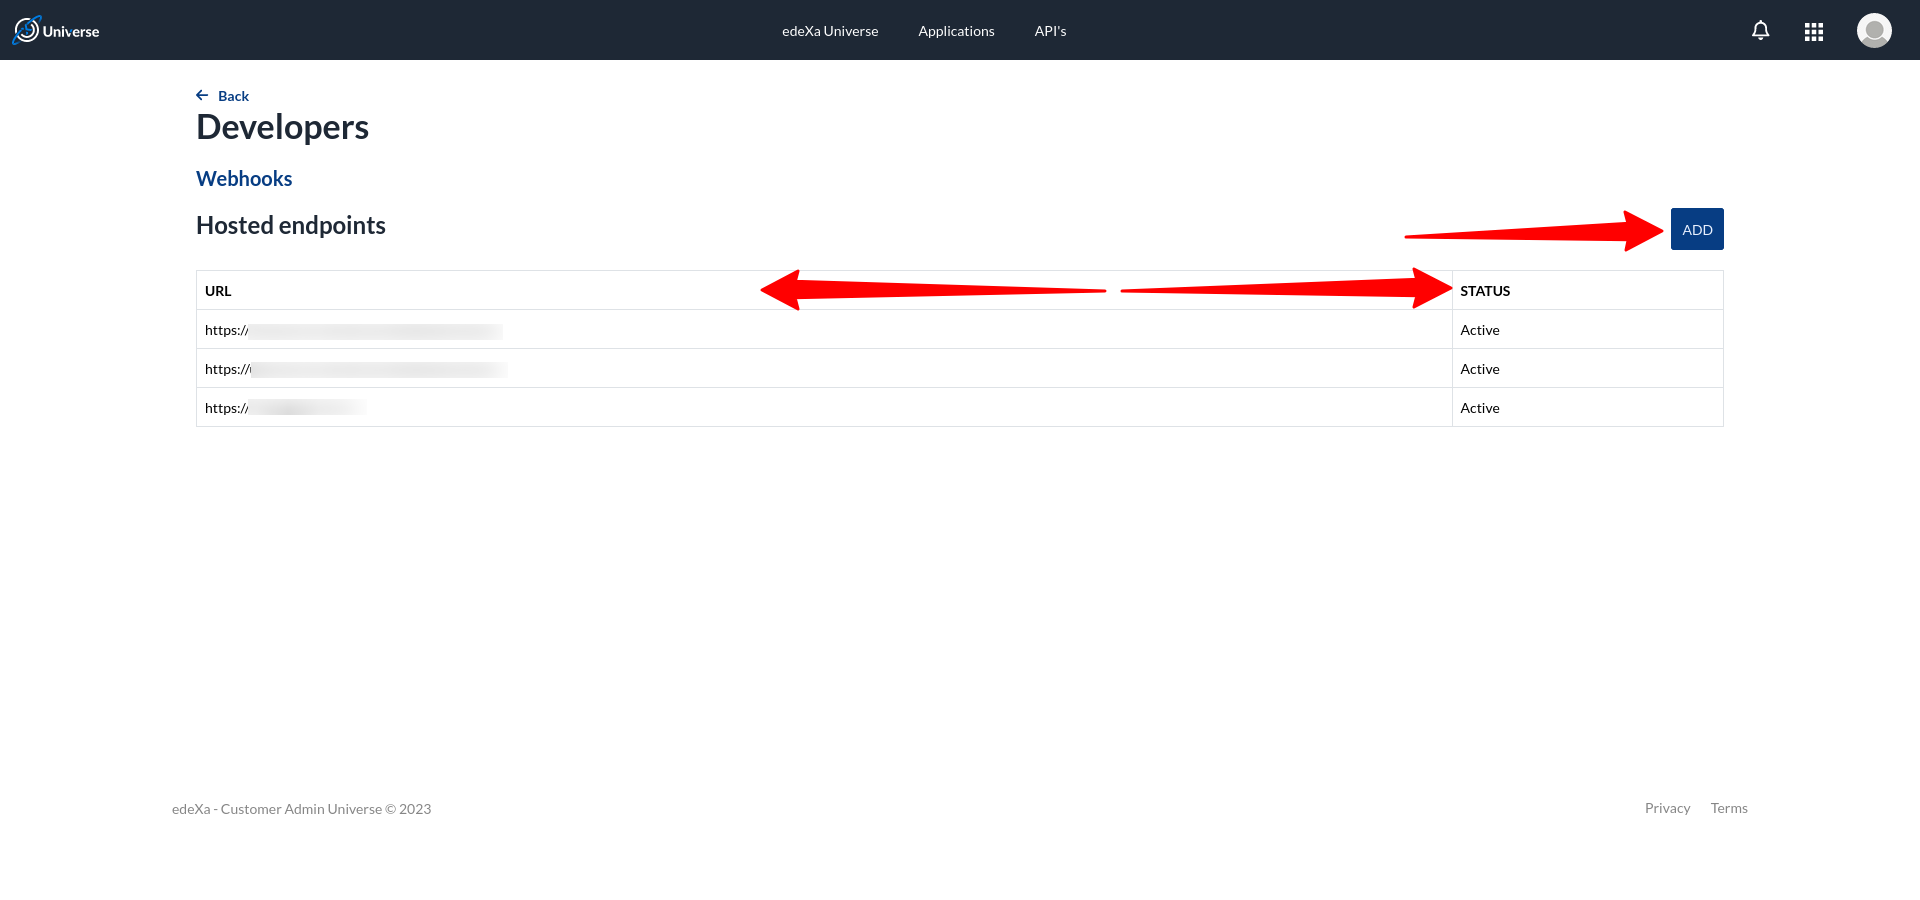
Once you click on webhook button there will be an list of webhooks added by you along with thier status. To add more webhook you can click on Add button.
After clicking on Add button, you will be on events list form page, where you have to add endpoint url along with it's description.That endpoint url will be the essential url on which webhook will listen as per seletced events.
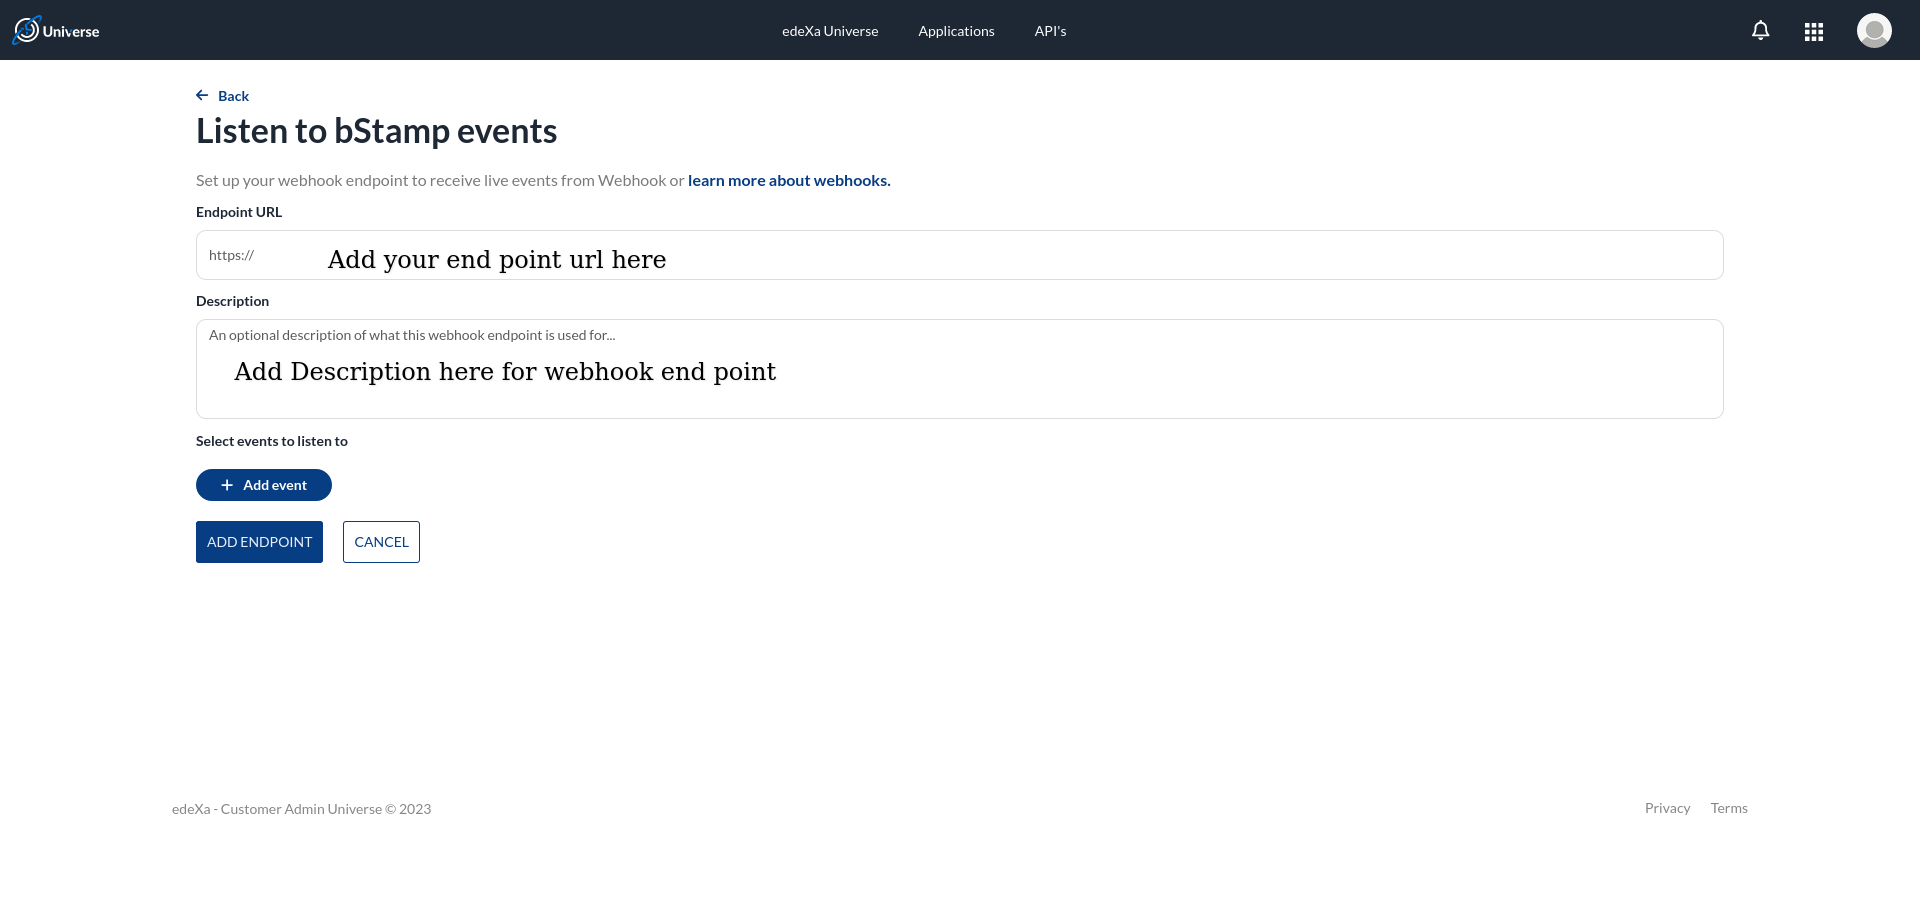
To add events corrospond to endpoint url click on Add event button and select available events from the list as shown in image.(eg: Hash, Here hash is name of event and Succeed & Failed are subevents)
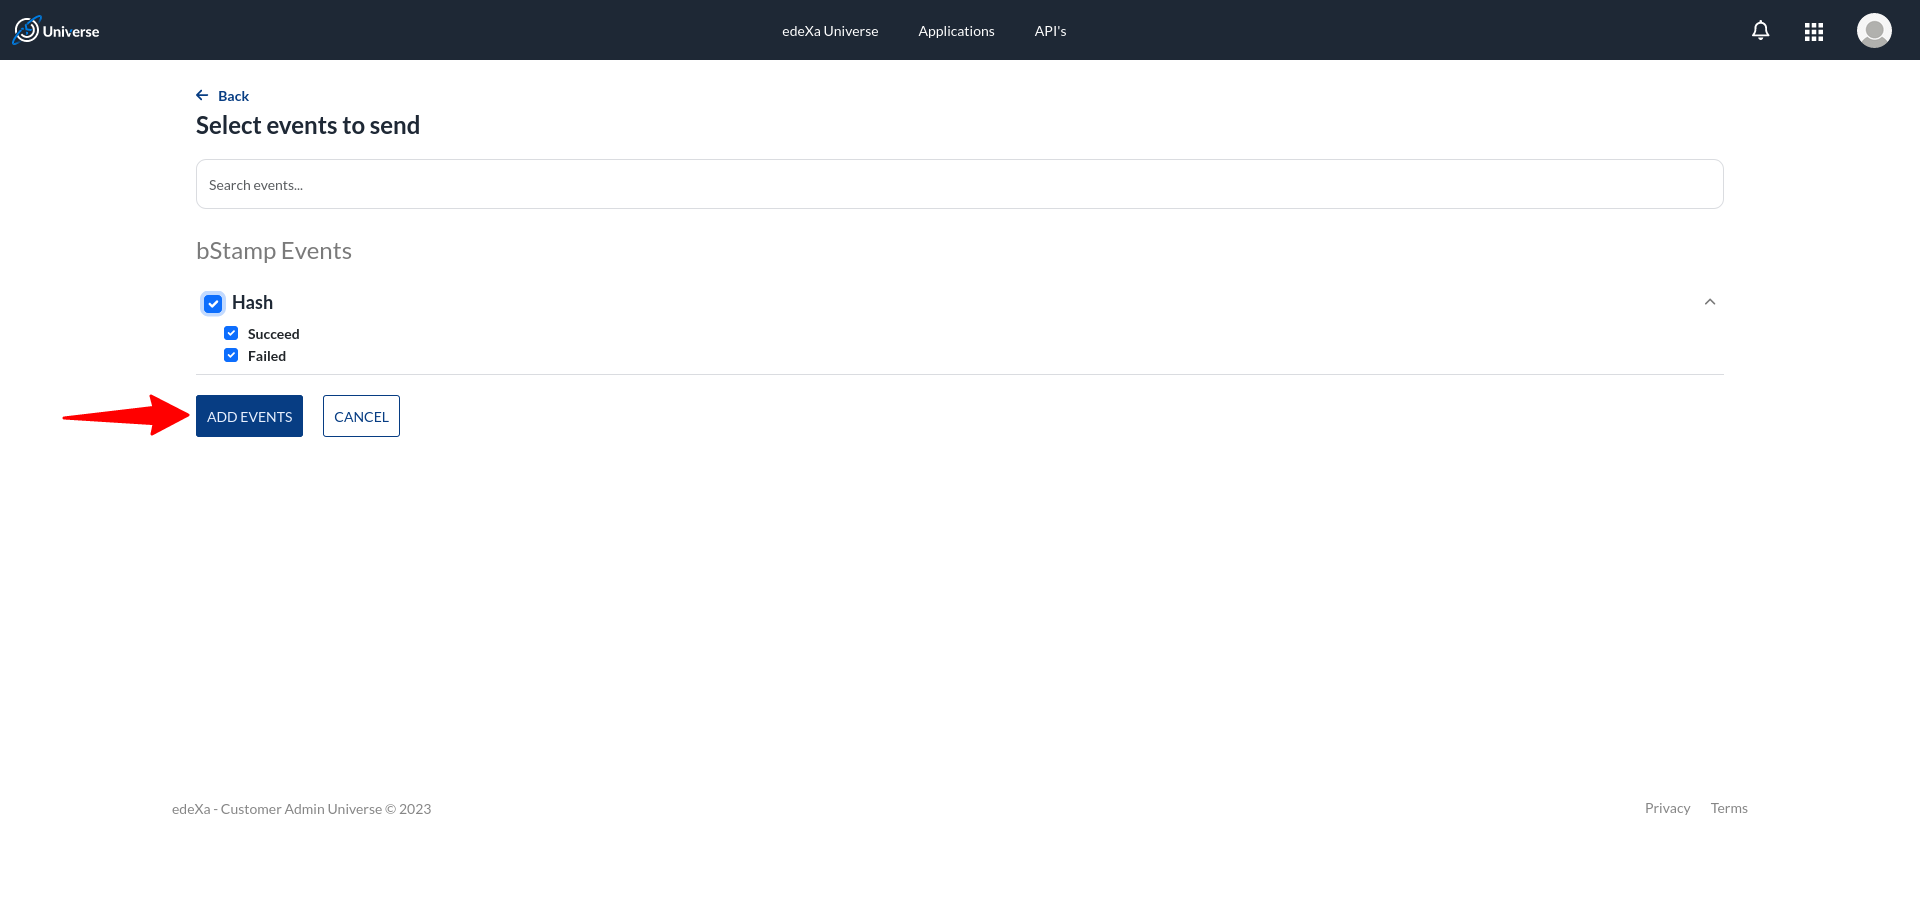
Once you choose events, corrospond to your endpoint url, then you have to click on Add Endpoint button to end webhook configartion.
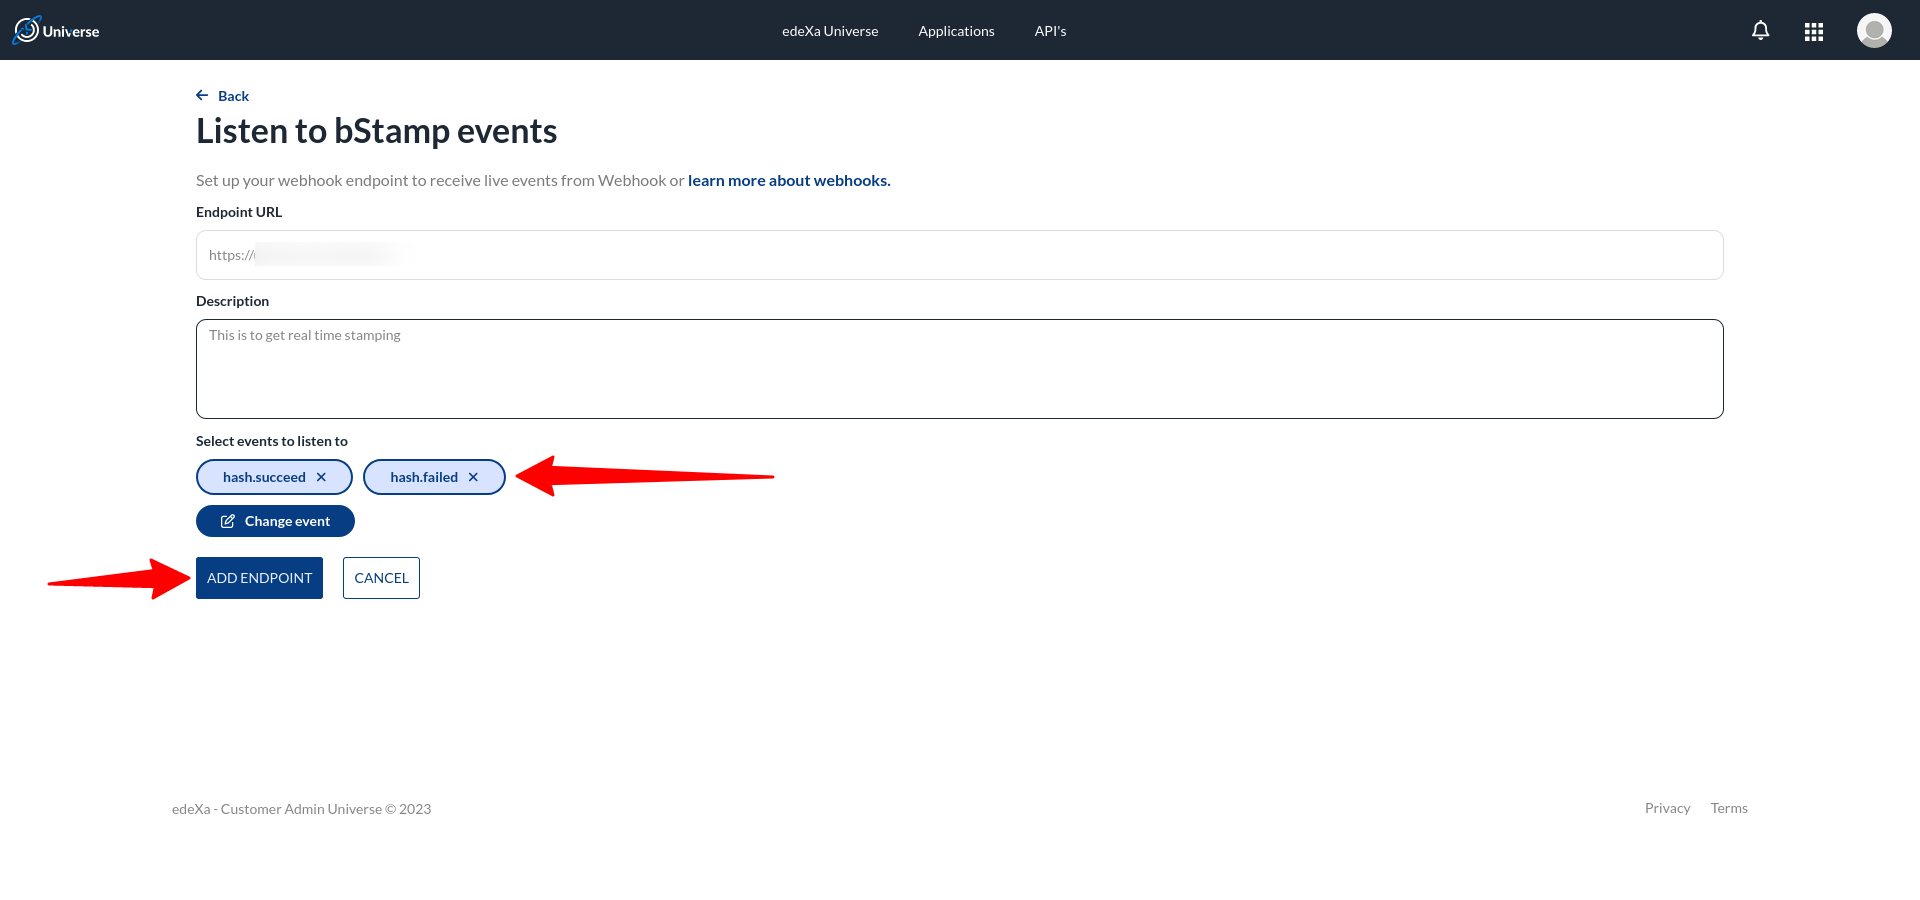
Here your recently configured webhook will be added to the webhook-list with it's url & status.
🖖 Become a part of bStamp community
Connect and get the latest updates of bStamp : bStamp Discord